Go to Products - Contracts.
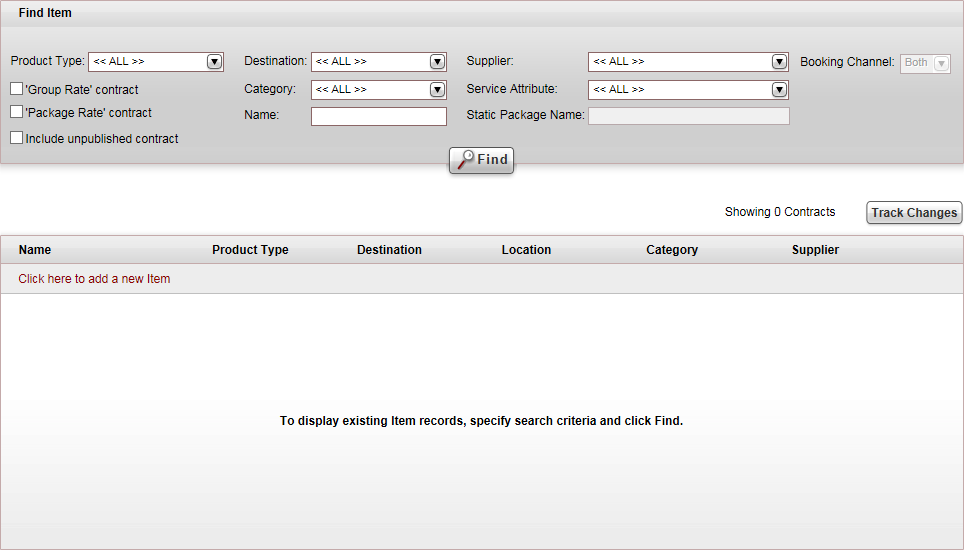
Click Click here to add a new item, and select New Visa.
A new item page opens in the Visa tab.
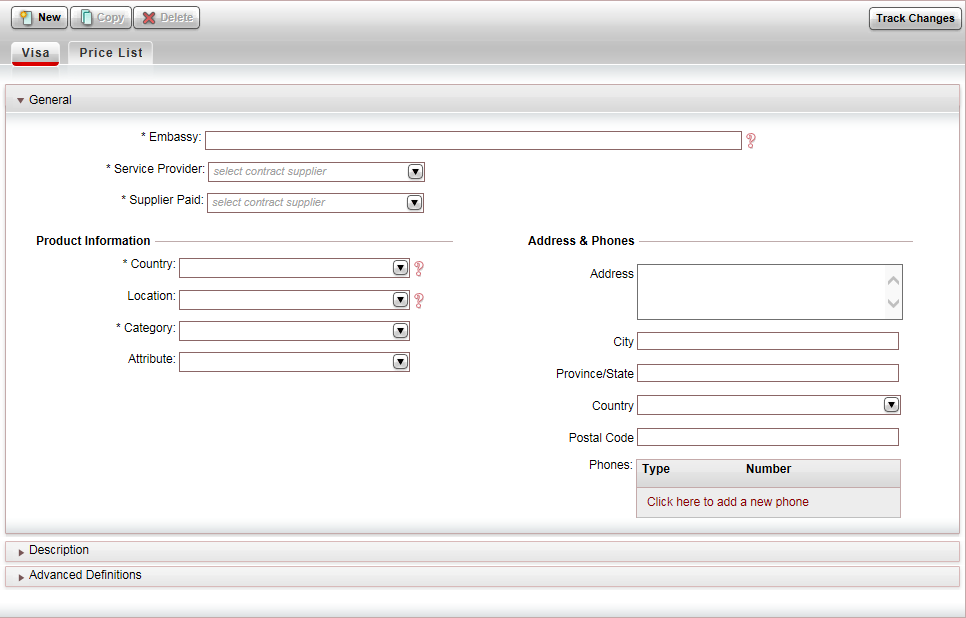
In the General expander:
Mandatory. In the Embassy field, enter the product name, for example Canada - Student Visa.
Mandatory. In the Service Provider field, select the visa supplier providing the visa from the drop-down list.
Mandatory. In the Supplier Paid field, select the supplier who is paid for the visa service from the drop-down list.
The fields in the Voucher and Transaction Definitions section are initialized according to the definitions in the Supplier account of the supplier you select.
In the Product Information section:
Mandatory. In the Country field, select the visa destination from the drop-down list, or create a new destination.

The Location field is not relevant for visa contracts.
Mandatory. In the Category field, select the category associated with the visa contract, for example Business, Student, or Urgent.
It is recommended to include the category name in the name of the product to provide more emphasis in the Reservations System.

In the Attribute field, select the service attribute associated with the visa contract.
In the Address & Phones section, if you have a direct contract with the embassy, enter the address of the embassy. Otherwise leave these fields empty.
Select the Description File / Pictures expander. It is possible to upload Price List Descriptions in different languages. This way, you can define different files in different languages, so that the product will be displayed in the user language in the Reservation System.
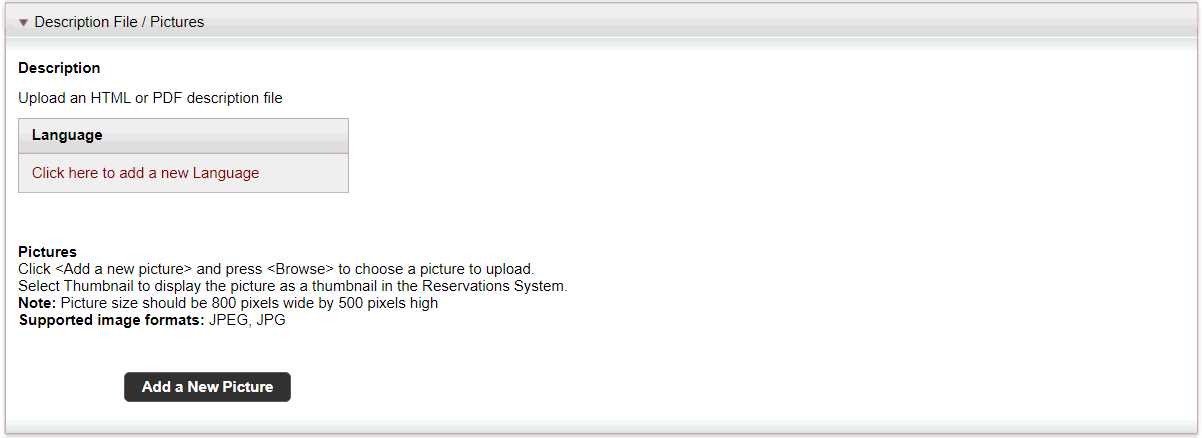
To upload an HTML or PDF description file, that contains a description of the visa product which is displayed in the search results in the Reservations system, click Upload.
|
In the travel file, in the travel file header, if you click the Print button, and select Send Documents, you can send the description file as an attachment in an e-mail message. |
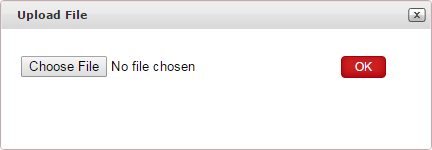
Click Upload.
Click Choose File, and select the HTML or PDF file to upload.
Click OK.
The Upload File dialog box is displayed.
To upload a PDF file of a visa application form that users can download from the website, in the Application section, click Upload, and browse for the file to attach.
Select the Advanced Definitions expander.
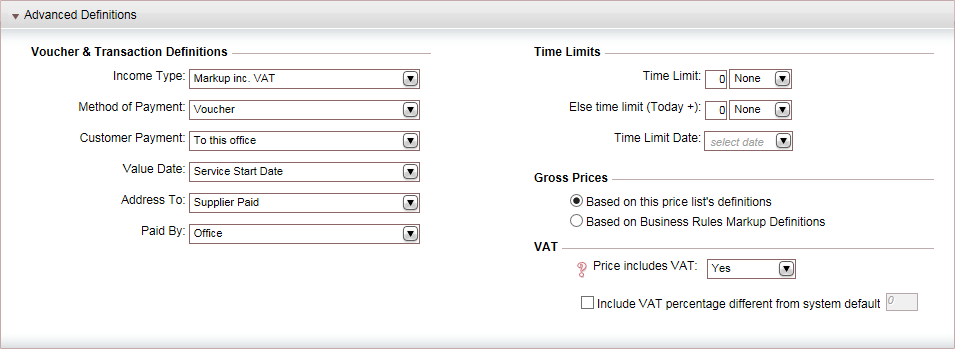
In the Voucher and Transaction Definitions section, the fields are initialized according to the definitions in the Supplier Paid's supplier account. However, you can edit these fields if necessary. Editing the fields in the contract does not affect the definitions in the supplier's account.
|
The Time Limits section is not relevant for visa contracts. |
In the Gross Prices section, select an option for calculation the selling price of the contract:
Based on this price list's definitions: The selling price is based on the definitions in the price list. This is the more common option as visa prices are usually fixed.
Based on Business Rules Markup Definitions: The system takes the net price from the contract, and applies markup from the definitions in Business Rules - Markup Definitions to create the selling price.
In the VAT section:
If the visa selling price includes VAT, in the Price Includes VAT field, select Yes.
If the VAT percentage is different from the system default, in the Include VAT percentage different from system default field, enter the correct VAT percentage.
|
This section is only relevant if you are working according to the Sales and Purchases accounting method. |
Click Save, and continue to create the Price List for the visa contract.