ACI documents issued during the reconciliation are issued in the invoice currency by default. If an ACI is issued for multiple invoices in different currencies, the ACI is issued in the Travel Agent's currency.
This topic explains how to reconcile documents between two travel agent/corporate client accounts.
If you have two travel agents/corporate clients that have invoices that need to be reconciled together, you can issue a credit note to reconcile the documents on both sides.
For example, travel agent/corporate client A and travel agent/corporate client B both have invoices that need to be paid for. Travel agent/corporate client A is also paying for travel agent/corporate client B's invoices. To do this the debit in travel agent/corporate client B's account needs to be moved to travel agent/corporate client A's account. This is accomplished with a credit note that credits travel agent/corporate client B and debits travel agent/corporate client A.
A credit note credits one account and debits another.
On the side issuing the credit note (the account that is credited): The credit note can be used to cover invoices and statements in the travel agent/corporate client account.
On the side receiving the credit note (the account that is debited): A receipt is issued for the credit note and the invoices and statements that need to be covered in the second account.
ACI documents issued during the reconciliation are issued in the invoice currency by default. If an ACI is issued for multiple invoices in different currencies, the ACI is issued in the Travel Agent's currency. |
Go to Financial - Travel Agent/Corporate Client Reconciliation.

Enter the search parameters:
Field |
Description |
Travel Agent/Corporate Client |
Select the travel agent/corporate client. If the user does not have the permit Perform accounting actions for all branches, only the travel agents/corporate clients attached to the user's branch are displayed. |
Branch |
The branch associated with the travel agent/corporate client. You can only select the branches you have the user permit to view. |
Invoice currency |
Select the relevant invoice currency |
Issue Date Until |
Enter the date range in which a financial document is issued |
Value Date Until |
Enter the date range in which a financial document is valued |
Travel File currency |
Select the relevant travel file currency |
All documents |
Select this radio button to search for all financial documents issued to a specific travel agent/corporate client. |
Selected only |
Select this option to only display documents that were previously selected and then saved (using the Save Selection button) |
If you do not select a travel agent/corporate client, you are going to be required to enter an issue date or value date range. The date range is limited to six months. |
Select Pending for reconciliation.
Click Find.
If you did not search for a specific travel agent/corporate client, a preview list of all the relevant travel agents/corporate clients is displayed.
The preview list contains the following columns:
Column |
Description |
Travel Agent/Corporate Client Name |
The name of the travel agent/corporate client |
Balance |
The travel agent/corporate client balance. |
Reduction |
The total amount of reductions owed to the travel agent/corporate client. |
Left to Pay |
The total amount that is left to pay by the travel agent/corporate client according to the search parameters you entered previously. |
Curr |
The currency in which the travel agent/corporate client account is handled. All amounts in the preview list are displayed in this currency. Documents issued in different currencies are converted using the rate of exchange on the document. If there is no rate of exchange on the document, the rate of exchange on the date the document is issued is used. |
If you did search for a specific travel agent/corporate client, skip to the result of step 5.
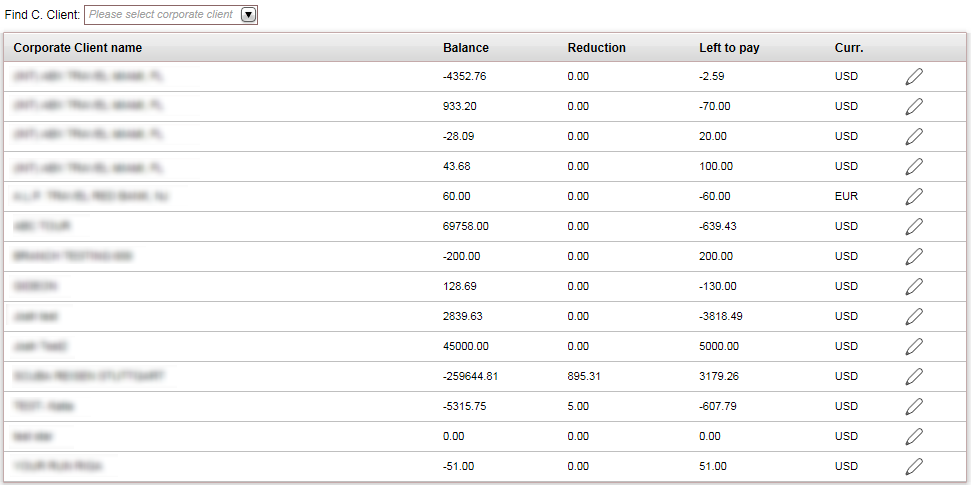
Click on the row of the travel agent/corporate client whose documents you want to display.
The financial documents are displayed in the results section with the data you requested.
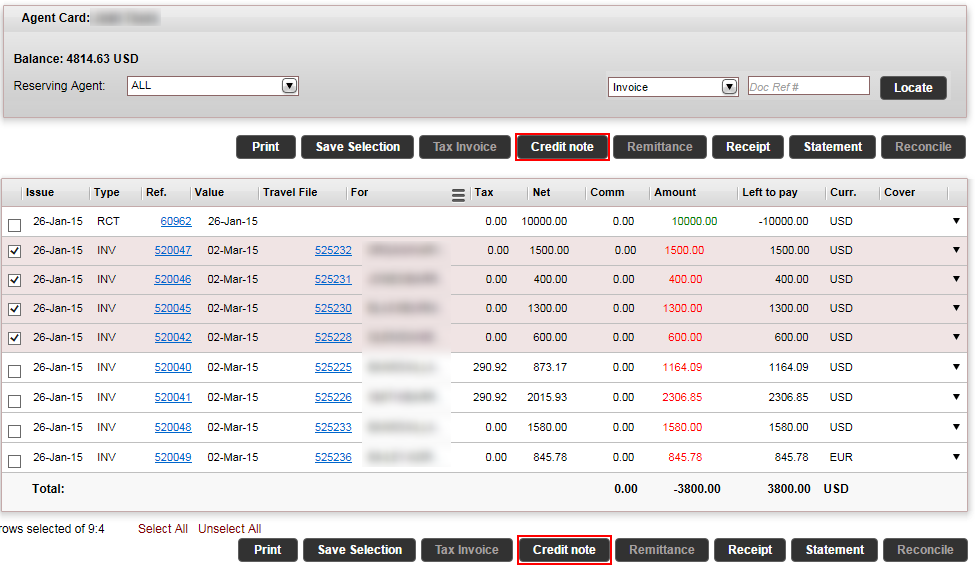
The results section contains the following columns:
Column |
Description |
Issue |
The issue date |
Type |
The document type: INV = invoice, RCT = Receipt, TXI = Tax Invoice, PRQ = payment requisition, RMT = Remittance, TRC = Transfer Receipt, STT = statement |
Ref |
The document reference number |
Value |
The value date |
Travel file |
The travel file number of the travel file the document was issued in. |
For/R. Agent/Branch/ |
In this column you can select by clicking on the hamburger
menu (
|
Tax |
The tax amount |
Net |
The net amount on the document |
Comm/Reduct |
The commission/reduction granted to the travel agent/corporate client |
Amount |
The total amount on the document |
Curr. |
The currency on the document |
Cover |
The covering document |
Select the invoices and statements you want to issue a credit note for.
|
You can save your selection for future use. |
|
The invoices and statements must be in the same currency as the account that will be receiving the credit note. |
At the bottom of the results, click Credit note.
The Credit Note Definitions page appears.
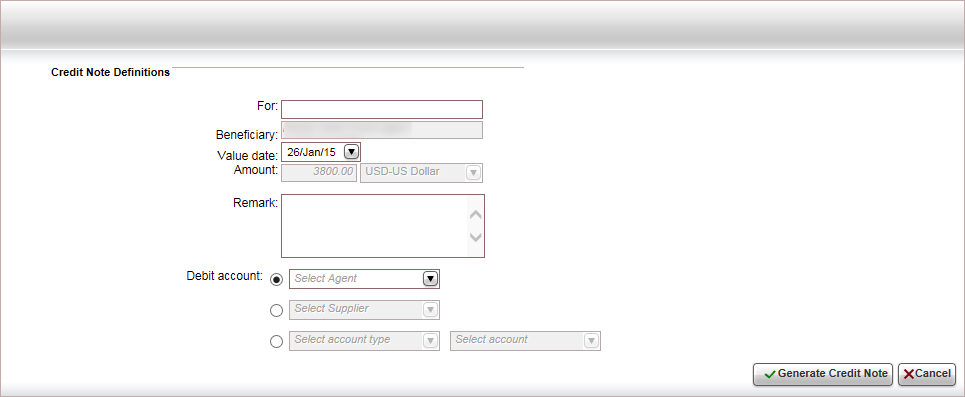
Enter the credit note definitions.
Field |
Description |
For |
Enter free text to be displayed on the credit note |
Value date |
Select the value date of the credit note from the drop-down list. |
Remark |
Enter a remark to be displayed at the bottom of the credit note. |
|
Note that the Beneficiary field is initialized with the name of the account to whom the credit note will be issued, and the Amount field is initialized with the amount and currency of the invoices. These fields cannot be edited. |
In the Debit Account field, select the travel agent/corporate client account that is going to be debited by the credit note.
Click Generate Credit Note.
The credit note is displayed.
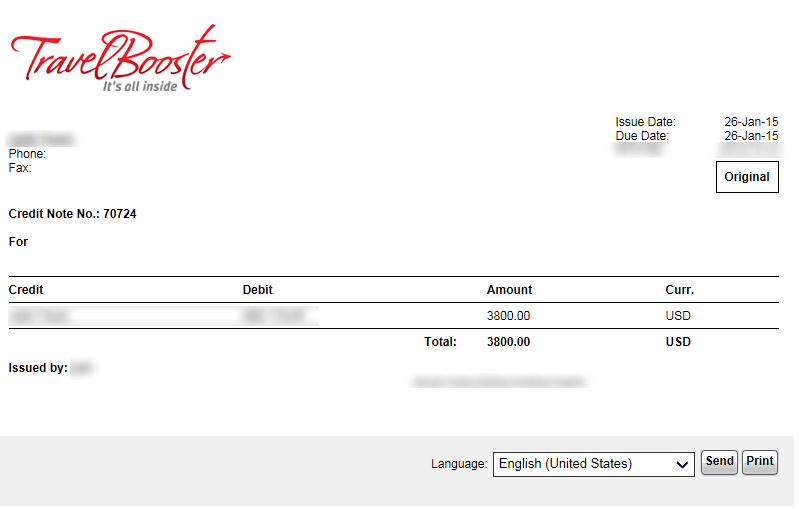
Click Back to reconciliation.
The invoices and statements are now covered by the credit note, and for each document a link to the credit note appears in the Cover column.
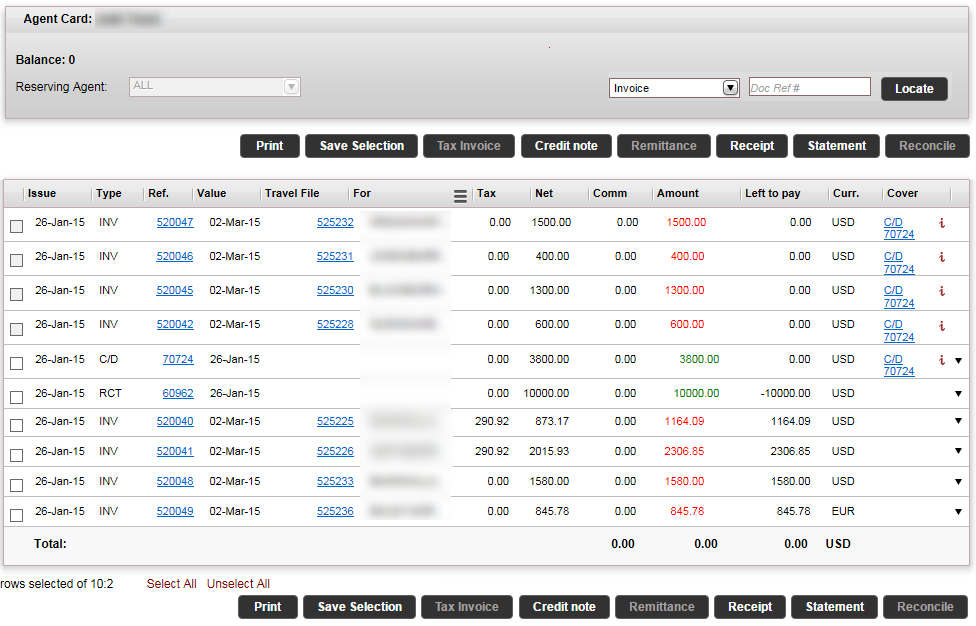
Repeat steps 2-5 for the travel agent/corporate client whose account was debited by the credit note.
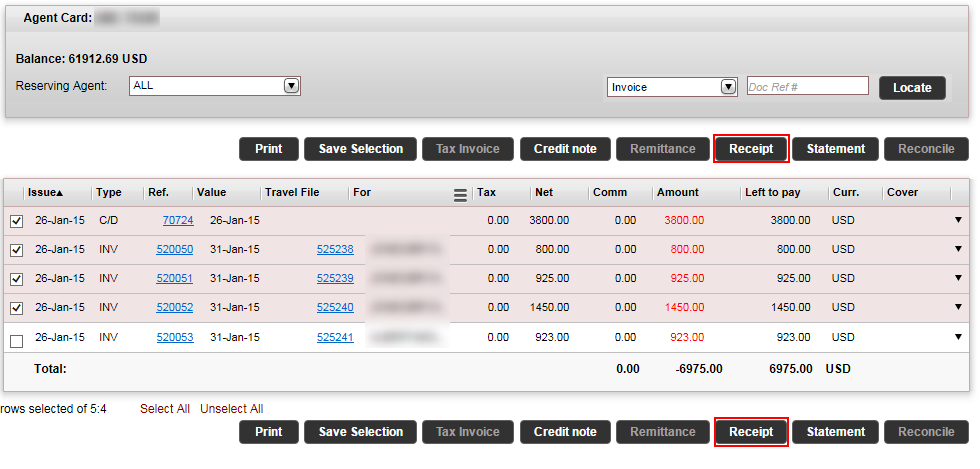
Select the credit note, and the invoices or statements you want to reconcile.
At the bottom of the results, click Receipt.
All the documents need to be in the same currency. |
The Receipt Definitions page appears.
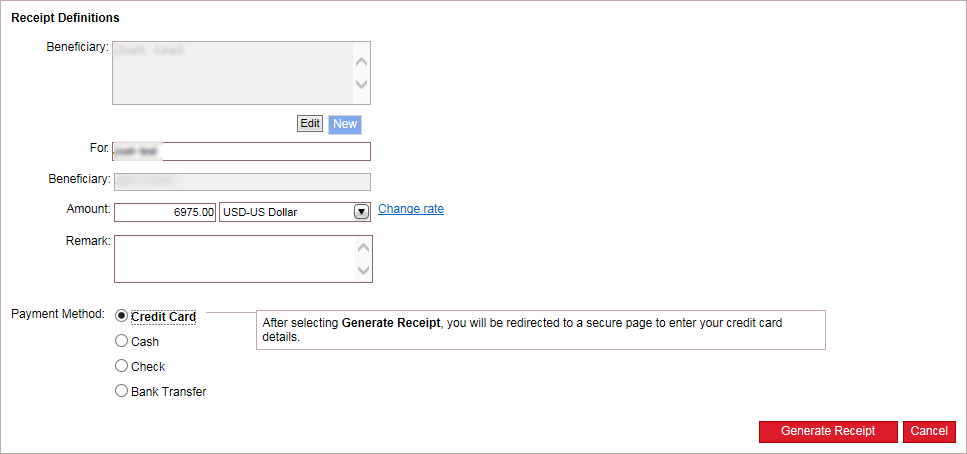
Enter the receipt definitions:
Field |
Description |
Beneficiary |
The beneficiary information is taken from the travel agent/corporate client account. Click Edit to edit the existing beneficiary, or New to create a new beneficiary. |
For |
Enter free text to be displayed on the receipt (for example, July payment). |
Amount |
The amount is initialized with the total amounts of the documents you selected. The currency is the same as the documents selected.
The amount has to be greater than zero. This action is dependent on the relevant user permit. The Force Match Limit is used for defining the percentage according to which documents in different currencies become fully covered, even though there are differences between the amount of the covering document and the amount of the covered documents. Differences in amounts can occur as a result of exchange rate differences or when the travel agent/corporate client sends partial payment. |
Remark |
Enter a remark to be displayed at the bottom of the receipt.. |
|
In the Payment Method field, select one of the following forms of payment:
Credit Card
Cash: In the Details field, enter free text associated with the payment.
Check: You can pay in installments using checks, and a receipt can be issued for multiple checks. Each row in the table represents a single check.
Each check is displayed as a separate row in the receipt, and in the cashier module.
In the Bank field, enter the name of the bank that appears on the check.
In the Branch field, enter the branch number that appears on the check.
In the Account field, enter the account number that appears on the check.
In the Check number field, enter the check number that appears on the check.
In the Amount field, enter the amount of the check.
In the Value date field, select the date that appears on the check.
To add a new check, click Click here to add a new item.
A new row appears where you can enter the check details.
To copy a check, in the row of the
check you want to copy, click the Copy
icon ![]()
A new row appears with the same details as the previous check, the check number and month are advanced by one.
To delete a check, click the Delete icon ![]() .
.
Bank Transfer:
The Bank, Branch, Account, IBAN and SWIFT code fields are initialized from the account. Review this information and change as necessary.
In the Reference field, enter the reference number of the transfer.
In the Value date field, select the date of the transfer.
In the Receiving Bank field, select the bank account receiving the transfer from the drop-down list. The bank accounts displayed are those managed with the receipt currency.
Optional. If there are differences between the receipt amount and the invoice amount, and you don't want to save the receipt for future reconciliation, you can generate an additional credit or debit note (depending on the receipt amount) to balance the invoice.
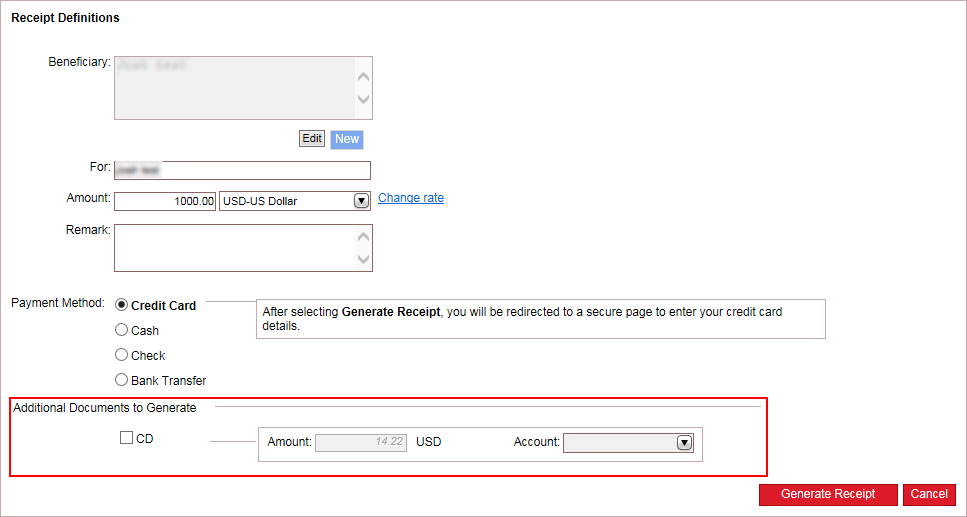
In the Additional Documents to Generate section, select CD or DC (the option displayed is determined according to the receipt amount).
In the Account field, select the account to be credited or debited.
Click Generate Receipt.
|
If you selected Credit Card as the payment method, you are redirected to a payment gateway. Enter the credit card details, and click Continue. Please note that a transfer receipt that is issued through a payment gateway cannot be cancelled. If there is a relevant Credit Card Usage transaction fee rule, the amount of the fee is added to the amount on which the receipt is going to be issued. The value date, for transfer receipts issued for credit card payments is end of the month (EOM) + 2. For example, if the issue date is July 20, the value date is August 2. |
The receipt is displayed.
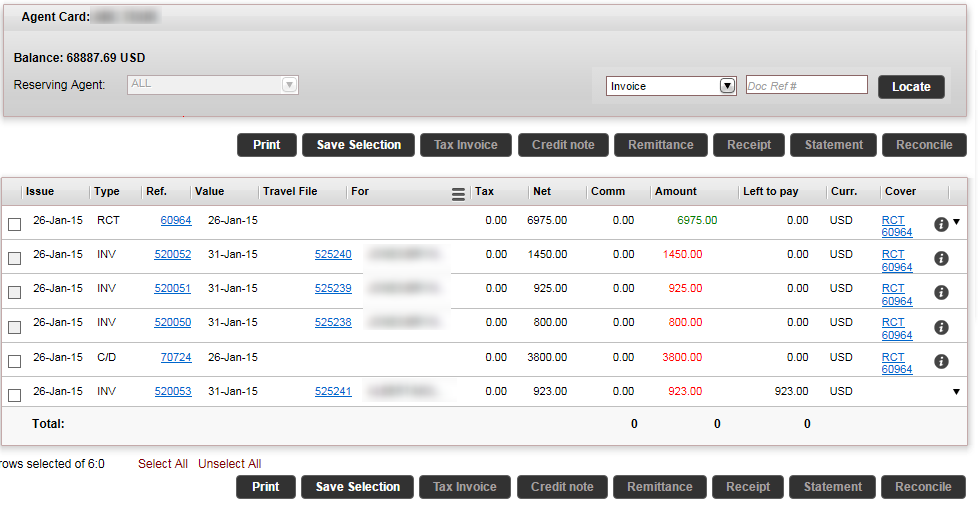
The credit note, and the invoices or statements are now covered by the receipt, and for each document a link to the receipt appears in the Cover column. If the invoices or statements amounts are lower than the receipt amount, the remaining balance of the receipt appears in the Left to Pay column.
If the receipt overcovers the documents, it can still be used to cover additional documents. You can also click Add Note to add an internal note in which you can enter the reason for the difference and the remaining balance. |