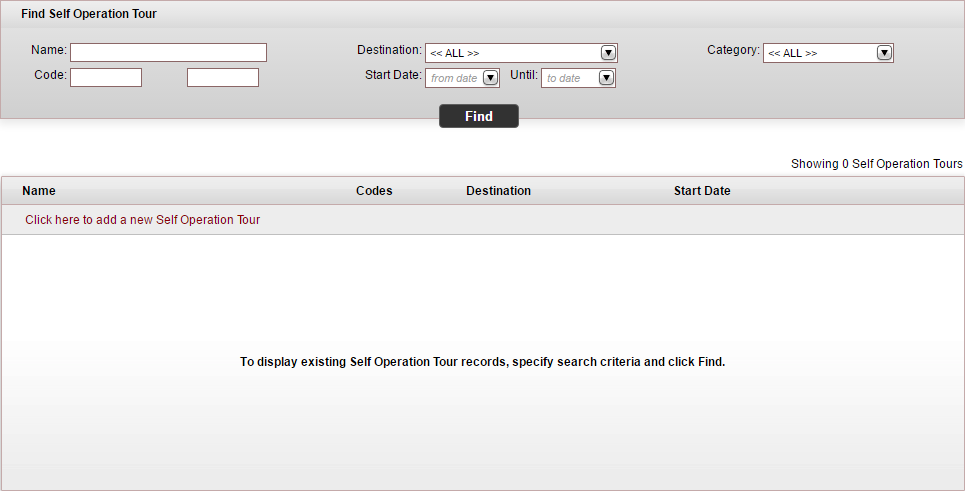
Go to Products - Self operation tours.
Click Click here to add a new self operation tour.
A new item page opens in the Information tab.
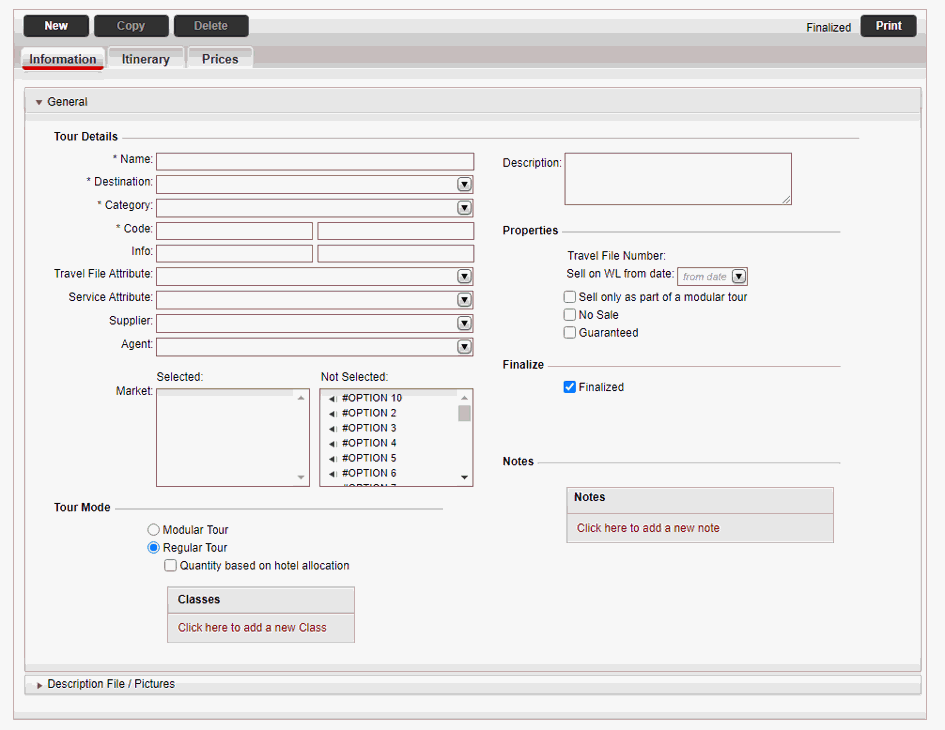
In the General expander, in the Tour Details section:
Mandatory. In the Name field, enter the name of the self operated tour.
Mandatory. In the Destination field, select the destination of the self operated tour from the drop-down list.
Mandatory. In the Category field, select the category of the self operated tour from the drop-down list.
Mandatory. In the Code fields, enter the code of the self operated tour. The code is composed of two 4-character (maximum) segments.
In the Info fields, enter information codes which can be used for any purpose. You can enter up to four characters in each field.
In the Travel File Attribute field, select the travel file attribute of the self operated tour from the drop-down list. This travel file attribute will be added to every travel file created for the self operated tour.
In the Supplier field, select the supplier of the self-operated tour from the drop-down list.

The supplier is used for defining separate commissions for different agents. The supplier is saved in the contract of the self-operation tour.
If relevant, in the Agent field, select the travel agent to associate with the self-operation tour.
In the Market field, select the markets to associate with the self-operation tour.
In the Description field, enter a description of the self operated tour. This description is displayed in the Reservations System.
|
Incoming tours, usually use the category to designate the language of the tour, for example: English tours, French tours, Spanish tours, etc. |

 Click here for more information
on tour codes.
Click here for more information
on tour codes.Select Regular Tour.
Select Quantity based on hotel allocation.
In the Number of classes field, select the number of classes (maximum 10) in the regular tour from the drop-down list.
Mandatory. In the Define class name fields, select the names of the classes from the drop-down list.
|
Once the self operated tour is saved, the Travel File Number field displays the number of the travel file created in the Reservations System. |
If the regular tour can only be sold as a component of a modular tour, select Sell only as part of a modular tour .
If required, select No Sale to suspend the sale of the self operated tour.
If the tour is always sold as Confirmed, select Guaranteed
|
This option is disabled if the Modular Tour mode is selected. |
This option should be selected when you have finished working on the tour and are ready for it to be sold through the Reservations System.
|
If selected, Finalized is displayed in the upper right corner of the page. If not selected, Under construction is displayed in the upper right corner of the page, and the self operation tour does not appear in the reservations system. |
In the Notes section, to add an internal note, Click here to add a new note.
The Note dialog box is displayed.
Enter the note text and click OK.
|
The note is displayed in the Administration Tools, in the self-operation tour, and in the search results when searching for travel files by tour (Find Travel Files by Tour). |
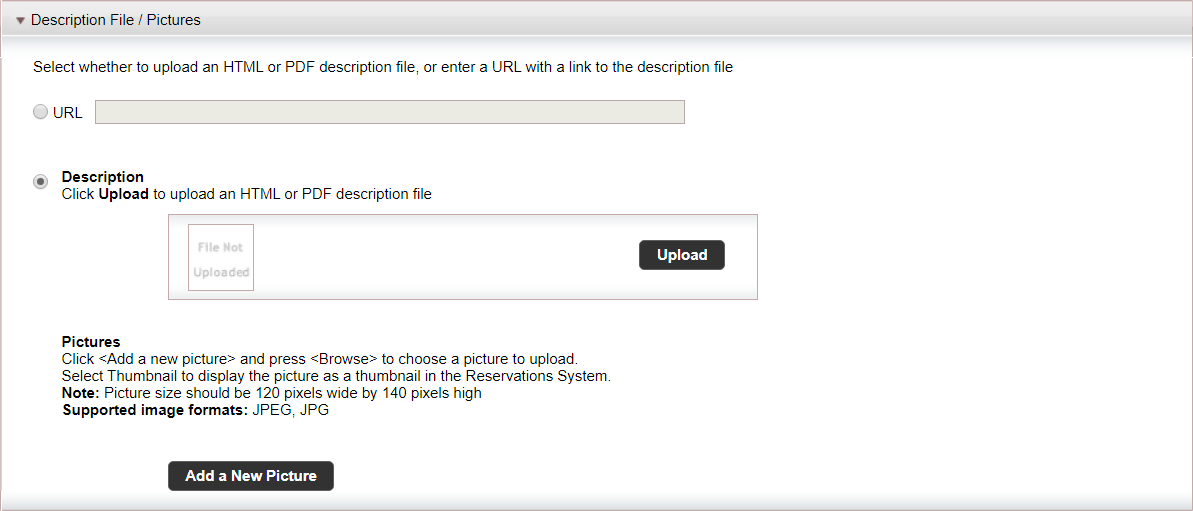
The options in this expander are used to upload HTML and PDF description files, link to webpages with the tour description, and upload pictures to the self operated tour.
To create a link to a webpage with the description for the self-operation tour, select URL and enter the link.
To upload an HTML or PDF file:
Click Add a New Picture.
Browse for the file, and click Upload.
To delete an existing picture, click Remove.
Repeat steps i-iii for each picture you want to upload.
Select the image to display as the thumbnail image that appears in the search results, the rest of the images are displayed in the Tour Details page.
|
The URL allows you to have a single description for an entire series of tours. Any changes made to the linked webpage will automatically update all tours in the series that share this link. Therefore, when using this option, the tour description file needs to be saved in an external website (not Travel Booster) where it can be independently and easily updated. |
Click Save.
Continue to define the dates of the tour and create the itinerary.