This topic explains how to create and edit price lists for transfer
contracts.
For each market, season and price level, you can define custom remarks
which can be displayed on the voucher, Booking
Details page, reservation, itinerary, during the booking process,
or Only to B2E users. You can define that the remarks only be displayed
in Reservations Systems in a specific language.
Select the Price
List tab.
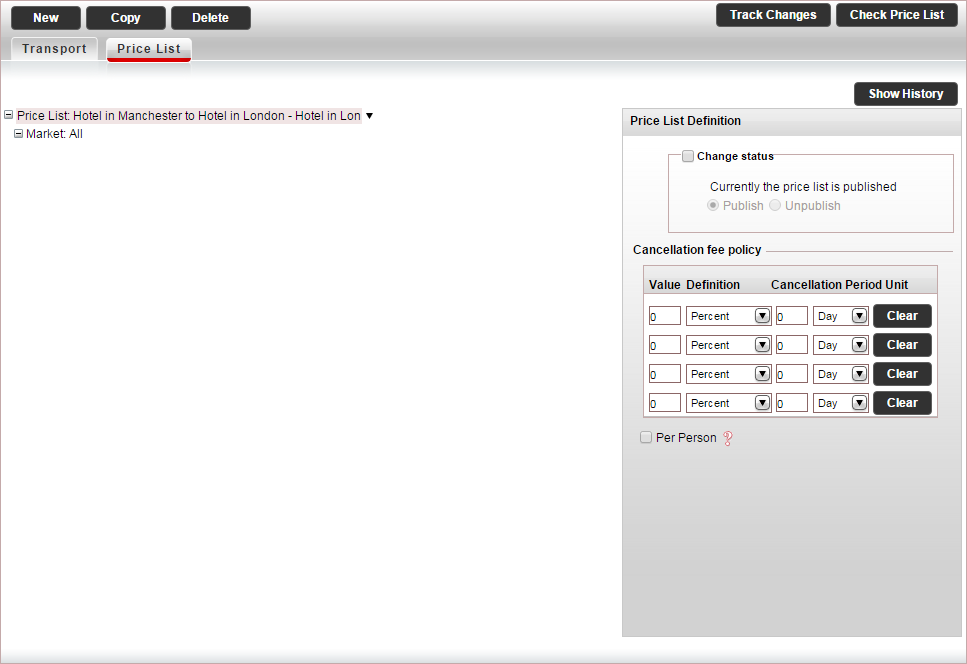
In the Price
List Definitions pane, define the cancellation fee policy for
the transfer.

|
The cancellation fee can either
be defined in the contract or in the Cancellation
Fee Policy module, depending on your agreement with the
supplier.
If the supplier charges a cancellation
fee, you need to define the cancellation fee in the contract.
If markup is defined in the Markup Definitions
module, when the cancellation fee is applied the profit margin
is maintained.
If the
supplier does not charge a cancellation fee, you can choose
to create a business rule in the Cancellation
Fee Policy module
for charging cancellation fees from customers.
However, cancellation fees defined in the
contract always overrule cancellation fee business rules.
For more information, see Cancellation
Fee Logic.
If you are defining the cancellation fee
in the Cancellation Fee Policy
module, skip to step 4 (and ignore step 6).
If you are defining the cancellation fee
in the contract, you can enter a cancellation fee for the
entire price list, or enter cancellation fees that apply to
specific seasons. If you want to create a cancellation fee
for a specific season, skip to step 6.
Each cancellation fee policy can comprise
up to four cancellation fee periods. |
In the Cancellation fee policy
section:
In the Value
Definition columns enter either an amount, percentage,
or number of nights.
In the Cancellation
Period Units columns enter the cancellation period.
For example if the cancellation fee for cancelling up to five
days in advance is 25%, in the Value
Definition columns, enter 25
and select Percent, and
in the Cancellation Period Units,
enter 5 and select Day.
To clear a cancellation fee policy, click Clear.
If the cancellation fee is an amount and not
a percent, you can apply it to all the passengers in the reservation,
by selecting Per Person.
In the price list tree, select the market All.
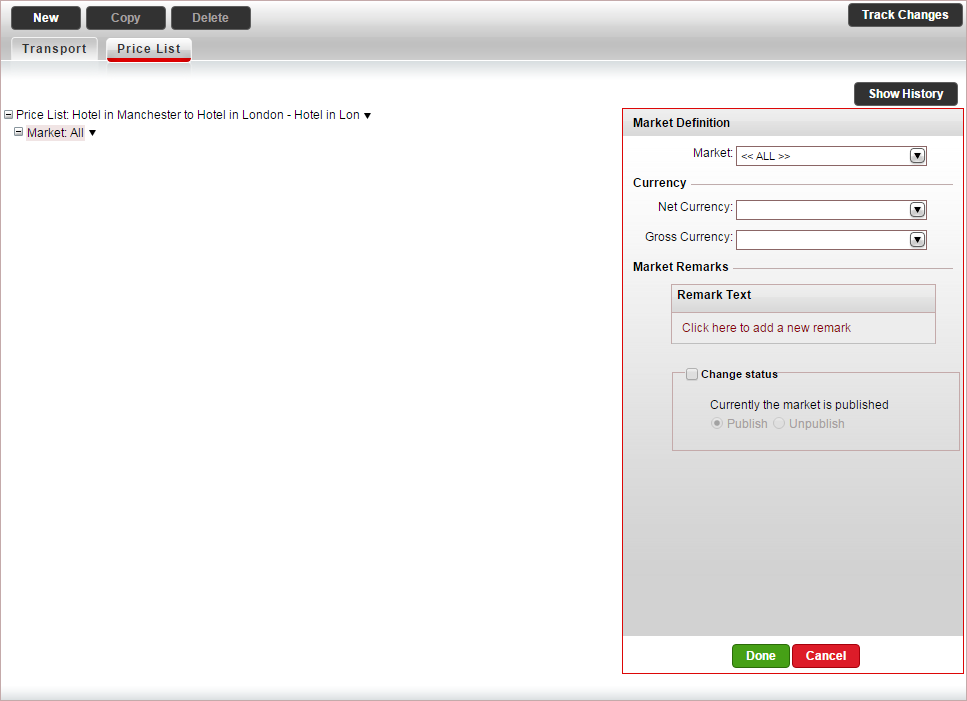
|
By default, the contract is going to
be displayed in the Reservations System. While working on
the contract it is recommended in the price list tree to deactivate
the price list. In the Price
List Definition pane, select Change
Status, and change the status to Unpublish.
Once the contract is complete, change
the status to Publish. |
In the Market Definition pane, in the Currency section, select the Net currency (Supplier currency)
and Gross currency (selling
currency) of the transfer service, and click Done.
The net and gross selling currency codes are updated on the price
list tree.
In the price list tree, right-click on the market,
and select New Season.
A new season is added to the price list.
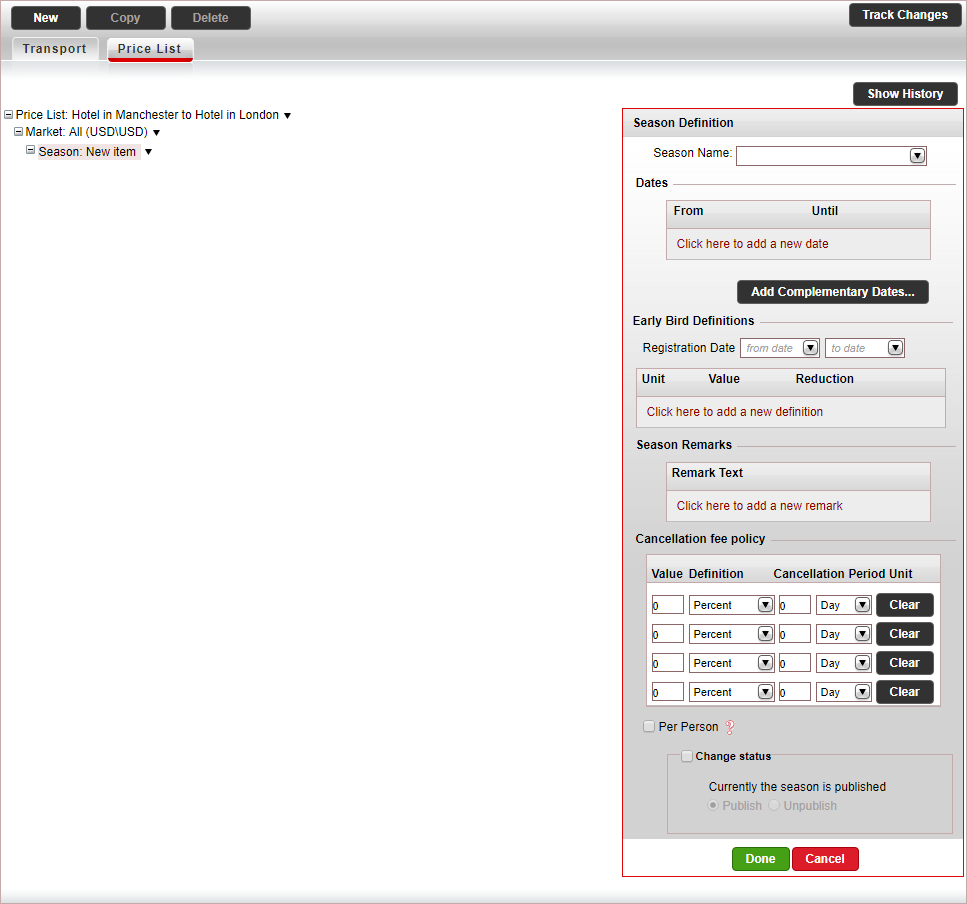
In the Season Definition pane, in the Dates section enter the season dates,
and click Done.
A season name is automatically generated by the system based on
the dates you enter.
The season information is automatically updated on the price list
tree.
If you want to use your own season names, in the Season
Name field, select a season name or create a new name,
and then enter the season dates.
In the price list tree, right-click on the season
and select New Price Level.
A new price level is added to the price list. The price level includes
the main and supplement price components that are defined in the default
transfer contract.
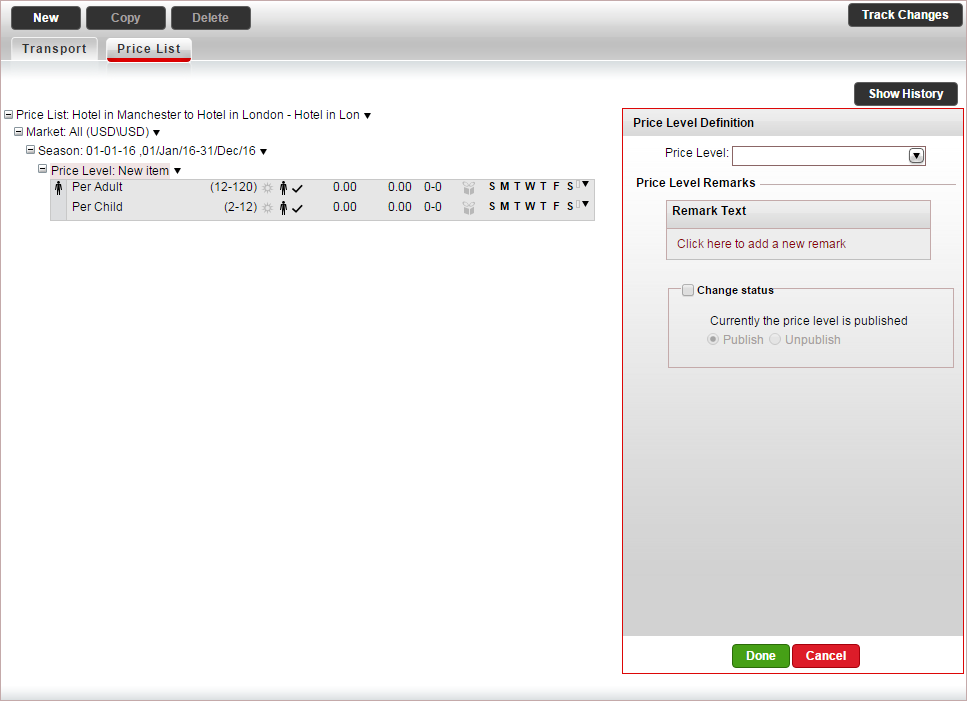
In
the Price Level Definition
pane, in the Price Level field,
select a price level you defined for the transfer contract.
|
If you did not create a price level
in advance, you can create a new price level, by clicking
<Add New Price Level...>. |
The price level information is automatically updated on the price
list tree.
If the price is only relevant for part of the
day (for example Day Transfer
or Evening Hours), in
the From Time and
To Time fields, enter
the hours in which the price level can be sold.
In
the price-list tree, select a main price component.
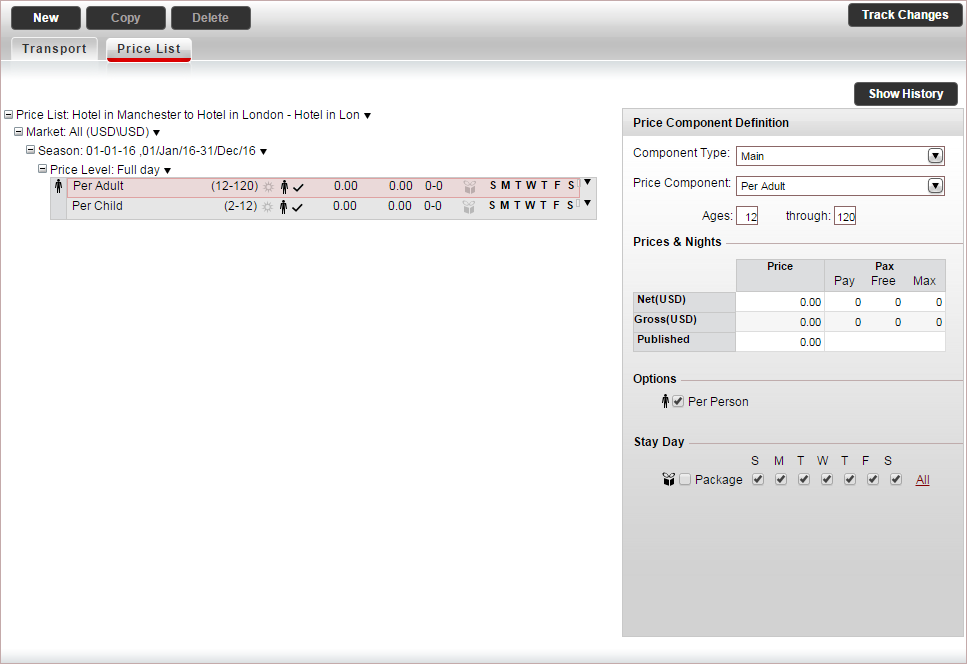
If you selected a default price component
which you want to change, in the Price
Component Definition pane, in the Price
Component Field, select the price component.
|
Any changes
made to the price component, only apply to the contract,
and do not affect the default settings saved in the
system. If you did
not create a price component in advance, you can create
a new price component, by clicking <Add
New Price Component...> With
Per Vehicle
components the ages are not relevant for transfer
price lists. |
With Transfers
for individuals: If the price component is calculated per
person, in the Ages field,
define the ages that apply to the price component. This can be
used to define seat per child
and seat per adult price
components.
With transfers
for groups: If you want to change the group size for the
price component, in the Min Passengers
and Max Passengers fields,
enter the minimum and maximum number of passengers who the vehicle
can be reserved for.
In the Prices
& Nights table, enter the relevant prices per day:
Net:
The supplier price of the transfer price component
Gross: The selling price of the transfer
price component
The Published amount
is updated automatically.
With
transfers for individuals, if the price component is calculated
per person, select per
person.
If there are
specific days of the week in which the transfer cannot be reserved,
clear those days in the Stay
Day section.
Click Done.
If you have an additional main price component
in the price list tree, select the main price component, and edit
it according to the previous step. Otherwise, delete this price component.
If you have additional main price components you
need to add to the price list, for each main price component, right-click
on the main price component,
select Copy & Paste Price Component,
and repeat step 9.
If applicable, in the price list tree, select
or create a supplement price component:
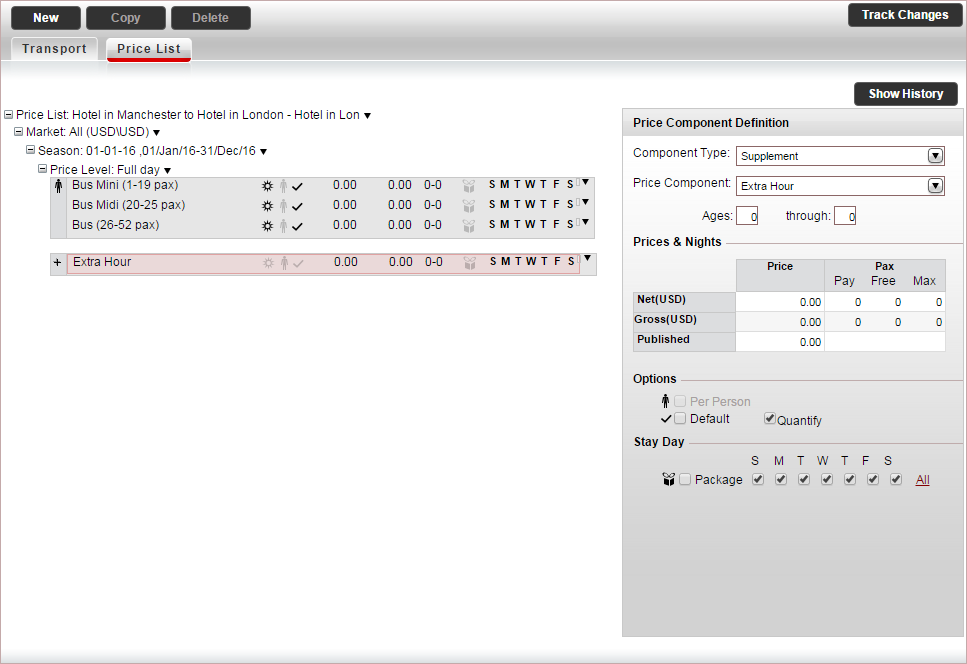
In the Component
Type field, select Supplement.
If you selected a default price component
which you want to change, in the price component, in the Price Component Definition pane,
in the Price Component
field, select the price component.
In the Prices
& Nights table, enter the relevant prices per day:
Net:
The supplier price of the transfer price component
Gross: The selling price of the transfer
price component
The Published amount
is updated automatically.
If
the supplement is optional and needs to be purchased separately
by the customer, clear the Default
option.
Click Done.
If you have an additional supplement price component,
select the supplement price component, and edit it according
to the previous step. Otherwise, delete this price component.
If you have additional supplement price components
you need to add to the price list, for each supplement price component,
right-click on the supplement
price component, select Copy &
Paste Price Component, and repeat step 10.
To add additional price levels, in the price list
tree, right-click on the price level and select Copy
& Paste Price Level.
The following message appears.

If you want to reset the prices to 0 in the new
price level click Yes. If
you want to keep the old prices, click No.
For each price level, you want to add repeat step
8-13.
To check the price list, click Check
Price List, and correct any mistakes that appear in the dialog
box.
Click Save &
Exit.
Related links