The Itinerary is a document that is sent to the passengers listing the different services ordered by the customer – all relevant dates and details. The itinerary does not include costs.
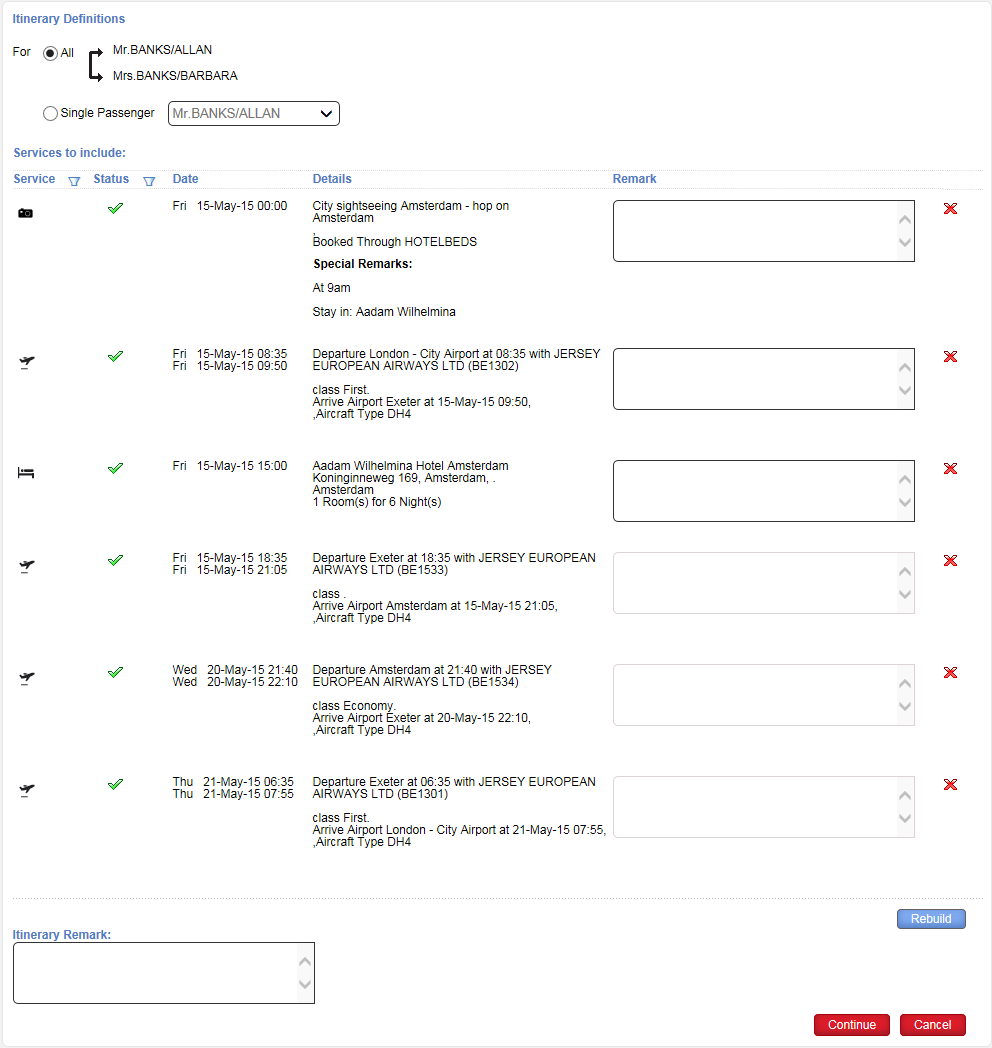
The itinerary can be customized in the Itinerary Definitions page. In this page, you can choose which services to include in the itinerary, to generate an itinerary for a single passenger or all passengers, add remarks to each service in the itinerary, and to the itinerary itself.
After generating the itinerary, you can print the document, save it as a PDF or send it by e-mail to the passenger. You can also send the itinerary to a mobile device. The services booked are displayed in chronological order, together with a map, alongside the option to plan the trip routing. This is possible for both B2E and B2B channels.
The following information is included on the Itinerary Definitions page.
Field/Button |
Description |
Itinerary Definitions |
|
| For | Select whether to issue the itinerary for all passengers or a single passenger. If you select a single passenger, only the services in which that passenger is included are displayed. |
Services to Include |
|
| Service | The service type. The service type is represented by an icon. Click the button to filter the services displayed in the Itinerary Definitions page according to service type. There are 16 different service types that can be sold through the system:
|
| Status | The transaction status. The transaction status is displayed as an icon. The status name appears as a tooltip. Click the
|
| Date | The transaction dates and time |
| Details | The transaction details |
| Remark | Enter in this field remarks to be displayed below the transaction
details.
With leg transactions, the remark is entered and displayed only for the first leg. |
 |
Click this button to remove the transaction from the itinerary. |
| Rebuild | Click this button to rebuild the itinerary. Transactions you removed are restored, and remarks you entered are deleted. |
|
|
| Itinerary Remark | Enter in this field a remark to be displayed below the itinerary. This remark is displayed in addition to the default remarks defined in the Administration Tools, in Setup – Database Definitions – Documents – Itinerary. |
| Continue/Cancel | Click Continue to generate the Itinerary. Click Cancel to return to the travel file. |
 button to filter the services
displayed in the Itinerary Definitions page according to status.
button to filter the services
displayed in the Itinerary Definitions page according to status. OK
OK None
None Request
 Waiting List
 Sold Out
 Cancelled with no
confirmation
Cancelled with no
confirmation