To access and perform actions in the module:
Assign the permit Update Setup Menus
To access and perform actions in the module: Assign the permit Update Setup Menus |
This page is used for managing the currencies used in your financial transactions. Each currency entry includes the currency name and the 3-letter ISO code representing the currency.
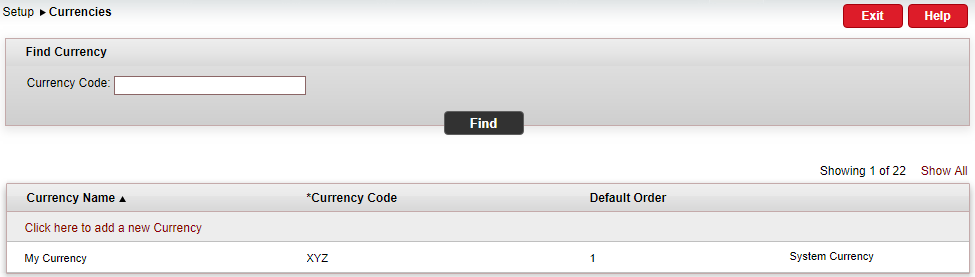
A new system installation includes a currency named My Currency with the currency code XYZ (see screenshot below). This currency represents your system currency, the currency in which your system is managed and your yearly balance presented. You will need to change the name of this currency to your actual currency before beginning work with the system. Additional currencies, relevant to the products which you buy and sell, can also be added.
After defining a new currency, the currency's rate of exchange must be defined in Financial - Rates of Exchange.
|
Note that once a currency is created, it cannot be deleted. |
Go to Setup – Business Environment - Currencies.
In the Currency Code field, enter part (first letters) or all of the currency code.
Click Find.
The currency matching the search criterion is displayed in the results section.
Go to Setup – Business Environment - Currencies.
Click Click here to add a new currency.
In the Currency Name field, enter the currency name.
In the Currency Code field, enter the currency's 3-letter ISO code.
In the Default Order field, enter a number indicating the currency's order of display.
The default order determines the order in which currencies are displayed in the drop-down list (throughout the system).
Click ![]() to save the new currency or
to save the new currency or ![]() to revert.
to revert.
|
You need to edit My Currency (your system currency) before beginning work with the system. |
Locate the currency you want to edit as described above.
Click the currency name.
The name is highlighted.
Edit the currency name as required.
Edit the currency code as required.
Edit the default order as required.
Click ![]() to save or
to save or ![]() to revert.
to revert.