Go to Setup - Queues.
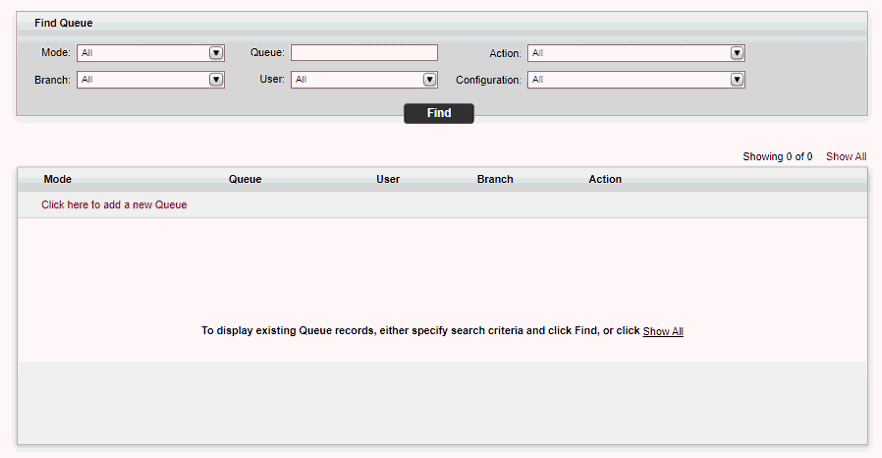
Click Click here to add a new queue.
The New Item page is displayed.
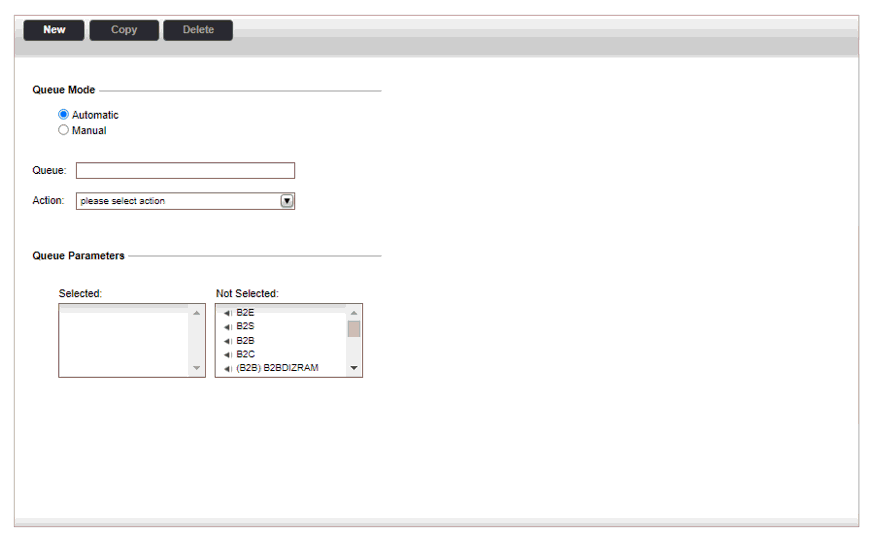
Choose between Automatic and Manual Queue Mode.
In the Queue field, enter the name of the queue.
If relevant define the following information:
In the User field, select the user to associate with the queue.
In the Branch field, select the branch to associate with the queue.
In the Action field, select the action that automatically enters the travel file into the queue:
Flight schedule change from interfaces: The travel file is automatically entered into the queue if the departure or arrival date and time changes for flight transactions from content interfaces. The travel file is automatically removed from the queue when the customers acknowledge that they have received the e-mail with the flight schedule change.
Depending on the action selected, a Parameters section may be displayed with additional options that can be selected for the specific action.
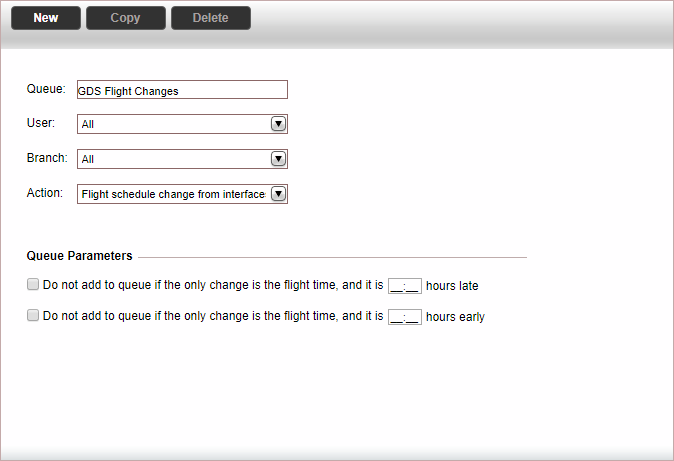
If relevant, in the Parameters section, select the following options:
Action |
Option |
Description |
Flight schedule change from interfaces |
Do not add to queue if the only change is the flight time and it is X hours late |
The travel file is not added to the queue if the only change to the flight details was to move the flight time to a later time within the range you define. |
Flight schedule change from interfaces |
Do not add to queue if the only change is the flight time and it is X hours early |
The travel file is not added to the queue if the only change to the flight details was to move the flight time to an earlier time within the range you define. |
Click Save and Exit.