Ensure that the relevant configuration is selected in the Configuration name field before defining any option on this page.
Click Save after updating any option on this page.
|
This page is used to customize the user interface components of the B2E, B2B, and B2C Reservation System sites.
The following page components can be customized according to your preferences:
General features of the Reservation System
Login Page used for logging into the system.
Header section of the Reservation System
Footer section of the Reservation System
From the drop-down list, select the default language in which the Reservation System login page is displayed to all users.
|
For a B2E/B2B/B2S user: After logging in, the language is determined by the specific language definition for the user. Before performing the initial login, the login page for all users is displayed in the default language. For a B2C user: This is the language in which the Reservation System login page is displayed. |
|
In B2E configurations, new passengers receive the language defined in this field. |
In B2B and B2C configurations only: Select this option to offer users a selection of languages in which to display the Reservation System user interface. When selected, a language link is displayed in the Reservation System (see example below). Clicking this link displays all the languages defined for this option.
In the Not Selected list, click the arrow by a language to include it in the Selected list.
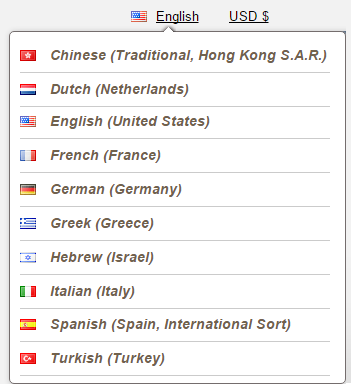
If the Show Selected Languages Only check box is not selected, all the languages appear in the language selection list in the Reservation System.
Use this option to define the color theme of the Reservation System's site.
Click Select Style to select a site color theme.
Select a theme and then click OK.
Use this option to define the logo that is displayed on all documents issued from Administration Tools and the Reservation System. Companies with different brandings for B2B and B2C designs can define different document logos for each branding.
|
If a customer is viewing a B2E travel file (which was sent as a link by e-mail) through a B2C configuration, the B2C logo is used. |
Click Browse.
Select the image.
|
Maximum image size: 820 pixels wide by 120 pixels high. Supported file types: gif, png, jpg Maximum file size: 97.66 kb. Image must be stored locally. |
Click Upload.
|
To delete an existing logo, click Remove. |
For Different Brandings: Select the Activate document logo per branding checkbox.
Repeat steps 1-3 for the B2E4B and B2E4C fields.
In this field you can upload a favicon image.
Click Choose file.
Select the image.
|
Maximum image size: 32 pixels wide by 32 pixels high. Supported file types: ico Maximum file size: 100 kb. |
Click Upload.
|
To delete an existing favicon, click Remove. |
In this field you can upload an HTML or archived HTML file which is displayed when no results are returned for a query.
Click Choose File.
Select the file.
|
Optimal image size: 750 pixels wide. No height limit. |
Click Upload.
|
To delete an existing file, click Remove. |
Use this option to upload a logo to be displayed in the login page.
Click Browse.
Select the image.
|
Maximum image size: 2,000 pixels wide by 1,100 pixels high. Supported file types: gif, png, jpg Maximum file size: 4096 kb. Image must be stored locally. |
|
To delete an uploaded header image, click Remove. |
Use this option to upload a logo image to be displayed in the background of the login page.
Click Browse.
Select the image.
|
Maximum image size: 277 pixels wide by 72 pixels high. Supported file types: gif, png, jpg Maximum file size: 20 kb. Image must be stored locally. |
Click Upload.
|
To delete an uploaded logo image, click Remove. |
Select this option to upload a header that will be displayed across the entire width of the page. The navigation bar with links to services will be displayed below the header.
|
Maximum image size: 1,200 pixels wide by 120 pixels high. Supported file types: HTML in zip Ensure that all associated files are on the same level (not in sub-directories) and that all URLs in the HTML source are relative. |
Click Upload.
Click Browse.
Select the file or archived directory.
Click OK.
|
To delete an existing header, click Remove. |
Select this option to upload a footer that will be displayed across the entire width of the page.
|
Maximum image size: 1,200 pixels wide by 250 pixels high. Supported file types: HTML in zip Ensure that all associated files are on the same level (not in sub-directories) and that all URLs in the HTML source are relative. |
Click Upload.
Click Browse.
Select the file or archived directory.
Click OK.
|
To delete an existing footer, click Remove. |
Select this option to define the elements of the standard Reservation System site footer. Selecting this option will activate the remaining options in the Footer expander.
Select this option to display the Home link in the footer section. After selecting the option, enter the URL of the website to which the user will be directed when clicking this link.
Select this option to display the Main Menu link in the footer section. Clicking this link will direct the user to the query page for the default service.
Use this section to define additional links (a maximum of 10) to be displayed in the footer section.
In the Name field, enter the text to be displayed when hovering over the image representing the link, and select the option to activate/deactivate this link.

Click the triangle by Picture
Not Uploaded and select Browse.
The Upload file dialog
box appears.
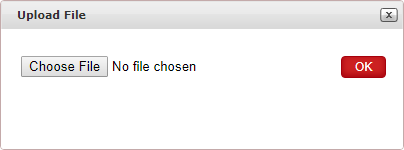
Click Browse.
Select the image.
Click OK.
In the URL field, enter the URL of the website (including the http:// prefix) to which the user will be directed when clicking this link.
|
|
 to designate the order in which the links will be
displayed.
to designate the order in which the links will be
displayed.